UNDERSTANDING THE MAKEUP OF GREEK YOGURT
Greek yogurt is yogurt that has been strained to remove most of the liquid whey. Because of this, Greek yogurt has twice as much protein as regular unstrained yogurt. Traditionally Greek yogurt is made only with full-fat milk; however you’ll find everything from full-fat to nonfat choices available.
Removing some of the liquid whey, water and lactose during the straining process does more than just make the yogurt creamy, rich and thick. This process increases the level of protein, and lowers the amount of sugar, sodium and carbs.
Before you add any sweetener to your batch of yogurt, think of all the savory substitutions! Use to replace sour cream, cream cheese, etc. Add spices and herbs for an amazing healthy dip!
Consistency: Greek yogurt is creamier than regular yogurt, though not as thick as Icelandic yogurt.
LET’S MAKE GREEK YOGURT!
WHAT YOU NEED: (affiliate disclosure)
Please know, this is what I use. You can certainly make the changes with what you already have. If you want my setup, I have links for each item that I use, only as a suggestion! I make yogurt once a week therefore I have found what works best for me.
I use only stainless steel and glass when making yogurt. I feel that it is important to use the stovetop instead of the microwave during this process as well.

- Matfer Strainer– you can always use a strainer that you already have covered with a cotton cloth. Please know that my strainer pictured is an older model. If you are in the market for a fabulous strainer, this is it!
- Stand for strainer
- 5 qt Stainless Bowl
- 4 qt Stainless Steel chef pan or 2.5 qt Stainless Steel Saucepan
- Metal Cooking Thermometer-I like this one because it will attach to the pan and it won’t melt! My plastic thermometer melted!
- Stainless Ladle
- Stainless Long Handle Spoon
- Stainless Whisk
- Cotton flour-sack towels (12 pack)
INGREDIENTS:
- 1/2 gal. Fat-free Milk, 2% Milk or Full Fat Milk
- 1/3 c powdered skim milk (for thickening)
- 1/4 c fresh yogurt (can be saved from previous batch. Needs to be used within 1 week.
- Organic Raw Honey or Organic Maple Syrup(optional)
- Vanilla Bean Paste or Organic Vanilla Extract
HOW TO MAKE YOGURT:
- Heat Milk to 180°F
- Cool Milk to 110°F
- Add Yogurt Starter to Milk
- Add Powdered Milk
- Wait for Yogurt to set 8 to 12 hrs – I let mine set in the over with only the light turned on. This will get the oven nice a warm.
- Strain Yogurt to separate the whey from the yogurt.
- Add sweetener and/ or vanilla (optional)
LET’S DO THIS!
- Pour 1/2 gal Milk in 4 qt Stainless Steel chef pan
- Heat slowly to 180°F -Be sure to heat slowly and stir periodically to keep the milk from scalding.

- Once the milk as reached 180°F, remove from heat.
- Let the milk cool down to 110°F.
- Once cooled – remove about a cup of the warm milk into a glass or stainless bowl, then add 1/4 cup yogurt and a 1/3 cup powered non-fat milk. Whisk everything together, really well making sure the yogurt and powered milk have dissolved.
- Pour back into the pan of warm milk.
- Mix gently- see below


USEFUL TIDING- Mix carefully not to remove the scalded or solid milk that has formed on the bottom of the pan. This may result in the yogurt not fermenting correctly.

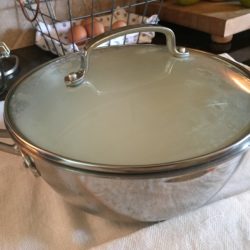
- Put a lid on the pan
- Wrap in a towel
- Then put in the oven that ONLY has a light on. The heat from the light alone will be enough warmth to work it’s magic. I’ve noticed my oven can get too hot, so I prop the door open sometimes.
- Let this set for 8 – 12 hrs. Eight hours normally works for me.


AFTER 8 TO 12 hrs
Check the milk / yogurt!
This is what it should look like. You did it! You made yogurt!


Now you will need to separate the yogurt from the whey. Carefully spoon the yogurt into a strainer that is covered with a cotton flour-sack cloth. Be sure to have a stainless bowl below the strainer. After you have spooned most of the yogurt into the strainer, go ahead and pour the rest. What you see draining from the yogurt is called whey. You can toss it, refrigerate it, or freeze it. I save it! If I don’t use it right away, I freeze it in ice trays. Great protein!
- For Greek yogurt you will need to let the whey drain for about 15 – 20 mins.
Once some of the whey has separated, put the yogurt in a container with a lid for storing. I use a glass container.


- Hand whisk the yogurt until it is creamy.
- Most of the time I leave the yogurt plain, but if you would like to sweeten it I have used some of the sweeteners below. Start with 2 TBL of honey. Sweeten a little at a time so you can decide what works best for you.
- Adding vanilla been paste or vanilla extract is delicious too! Again, a tsp at a time.
USEFUL TIDING – when I say “whisk” I mean whisk it enough (vigorously) to be creamy and silky smooth!


Refrigerate, eat, yum, repeat!

The yogurt will keep for about 1 week in the fridge.
As for the whey- great protein for your plants, on your hair, add to sauces and soups. It has a lemony taste so it isn’t bad, and it’s very nutritious! I put a little on my dog’s food. She loves it!
If I don’t use it right away, I freeze it in ice trays, then keep the cubes in the freezer for later use. Check out my post on how to use the whey.
I hope you’ve been inspired and come back often!
This post may contains affiliate links for items that I use and stand by. Although the links have no added cost or affect on you, I wanted to provided a disclosure for your trust and comfort level, should you use any links that I have provided. Click to read: Affiliate Disclosure


Leave a Reply