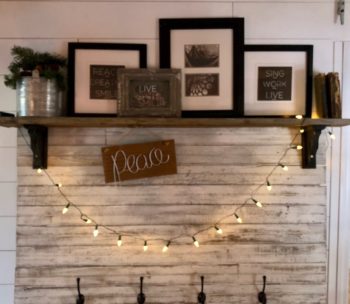
Hi friends! I’ve had several people ask for instructions to make this fun piece. I would rate this a fairly easy to medium effort project. Having the right tools is key!
WHAT YOU NEED:
The amount of boards you’ll need will be determined by the desired size of your coat rack. The list below is based on my finished project : 51 1/2″ (wide) x 30″ (long)
- 2″ x 2″ board – you need 12.5 ft
- 2″ x 4″ board – you need 5 ft
- 2″ x 6″ board – you need 5 ft for the shelf
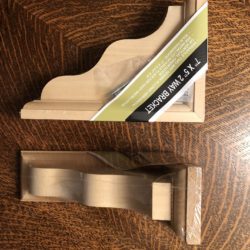
- 2- wood shelf brackets – pictured below (from Home Depot)
- 4 – 6 metal coat hooks
- 1/2″ x 3″ panels or strips of wood- body of the coat rack
- 2 1/2″ – 3″ wood screws
- 1 1/2″ wood screws
- 1″ brads for nail gun (16 or 18 gauge)- I used a nail gun, but finishing nails work too!
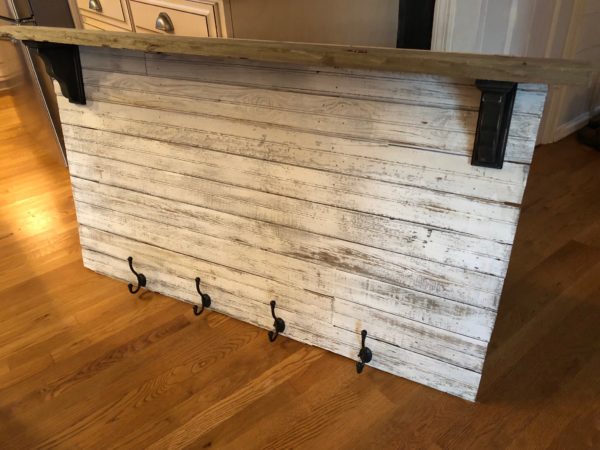
First you will need to determine the overall size you want the coat rack. Then we’ll start with building the frame for the back.
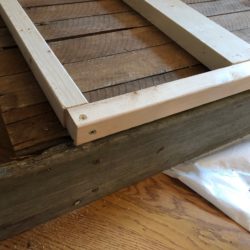
I didn’t want the 2 x 2’s to show from the sides so I measured the frame smaller on the sides. As you see in the second photo- I have a 3″ to 4″ overhang. The top and bottom frame goes all the way to the ends because the coat hooks and the shelf will be screwed into these boards. The finished size of my frame is 45″ x 30″
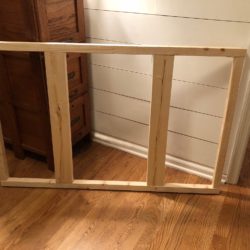
**Put this together with the 1 1/2″ screws. The 2″x 2″ boards form the outside of the frame, the 2″ x 4″ are braced on the inside of the frame.
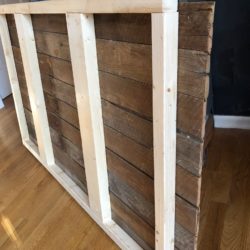
Next- we’re going to nail our 1/2″ boards to the front. Be sure to leave space at the top for the width of your shelf!
As you see, I used old weathered boards. You can use pallet boards, plywood strips or 1/2″ boards. I have a very small gap between these boards to make it look more like shiplap. If you buy ply-wood or new 1/2″ boards you will need to stain them a deep walnut or oak stain, then lightly add a white or cream color acrylic paint. Once dried, lightly sand the paint to get the weathered look. My boards were so old that I added some white to make it look more uniformed, as pictured in the first photo.
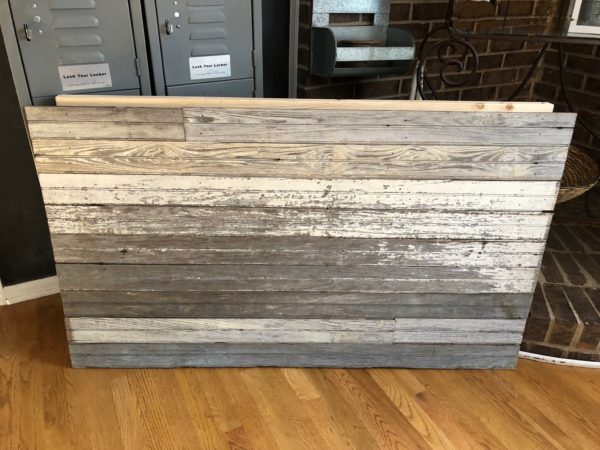
Adding the shelf; again, I have an old piece of barn-wood for my shelf. Notice I extended the length beyond the sides. Please know that your shelf brackets will be screwed onto the front and into the 2×2’s in the back. I bring this up to make sure the shelf length is proportionate to where the wood brackets will be.
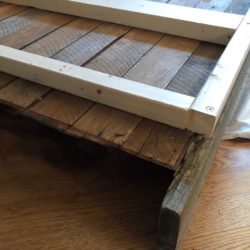
I used the 2 1/2″ screws for the shelf and the wood brackets.
Adding the wood brackets: I painted them black, lightly sanded all over, then sanded extra on the edges to get the weathered look.
As mentioned above, the wood brackets are attached to the front and aligned 2×2’s on the back. To attached to the shelf to the bracket, put the screw in from the top of the shelf. Don’t forget to paint the screw heads blacks.
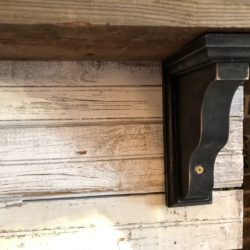
Put the coat rack hooks on the bottom, touch up the screw heads with black, even out the white on the boards to blend nicely, and wah-lah!
Decorate with books, frames, lights, plaques, candles, anything that you fancy!
Please send pics of your finished project! If you have any questions, drop me a line in the comments below.
Thank you for being here and come back often!





Absolutely beautiful!!
I’ve seen this in person and it is amazing!!!
Thank you Dee! I appreciate your kind words!